
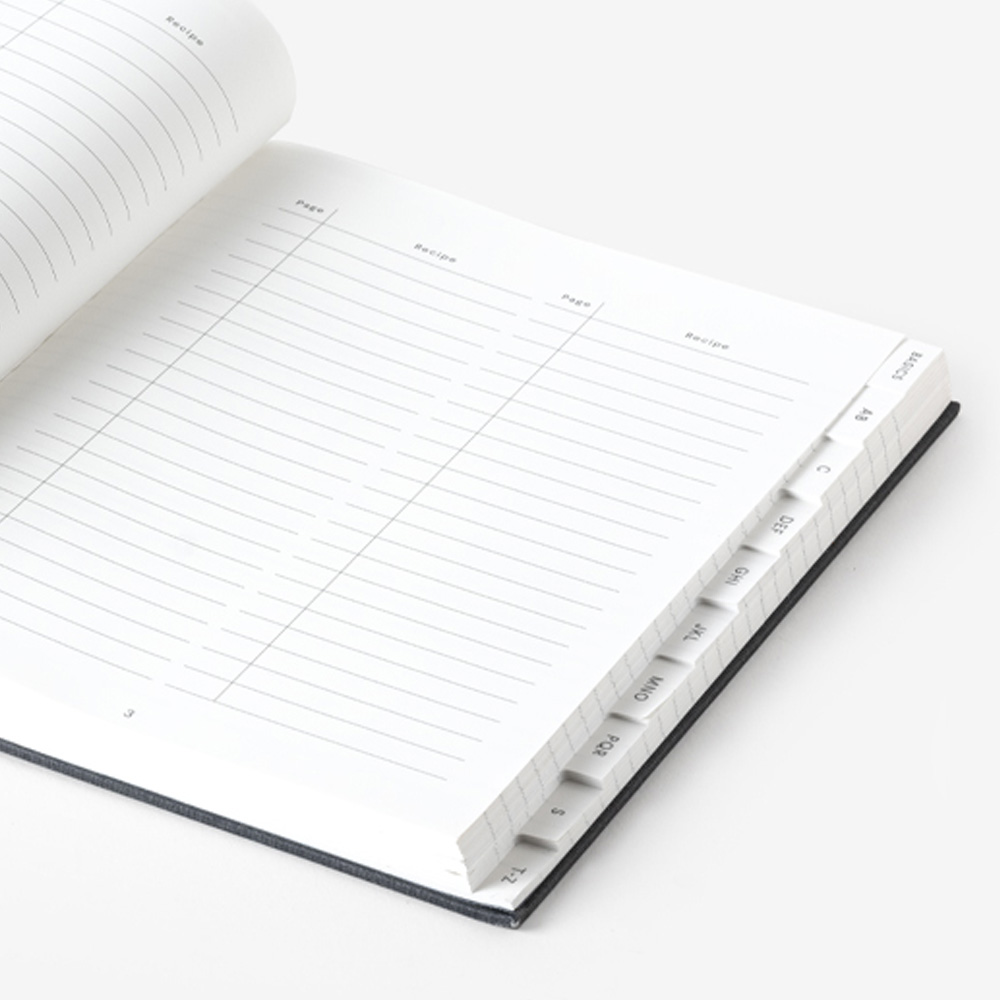
Tab Indexing
Indexing is a customisation style that allows you to divide your notebook into dedicated sections by adding easily accessible tabs with information on them. By including indexing within your journal you can easily separate it into relevant categories to make it easier for users to navigate. This is a customisation often seen within planners. We can offer two styles of indexing; Tab Indexing and Step indexing.
- Tab indexing is a style that features a single tab on the side of the notebook, with the same size single tab repeated for each section. Please note that tab indexing is available for ring bound notebooks only.
- Step indexing is a style that features incremental steps where less and less tab space is cut away from the pages, leaving the tabs all stacked and resembling steps. For instance, the first section of the notebook will have only a single tab on the side but the very last section will be a full sized page with no cut aways.

Tab Indexing
Step Indexing
Setting up artwork for Tab Indexing 

Tab Indexing is suitable for ring bound notebooks and can be setup using both Adobe Illustrator and InDesign, here’s how to set these up.
First you need to calculate how many chapters your journal will have, this will indicate how many tabs you need, allowing you to then work out the size of each tab. In this example we will use 12 tabs (one for each month featured in our diary) meaning that each of our tabs needs to be 17.5mm tall (210mm / 12months = 17.5mm)
Step 1: Prepare your artboards (using Adobe Illustrator)
Create an Illustrator file that is standard A5 size and ensure to add a 5mm bleed. If you don’t already have rulers on display simply click View > Ruler > Show Rulers
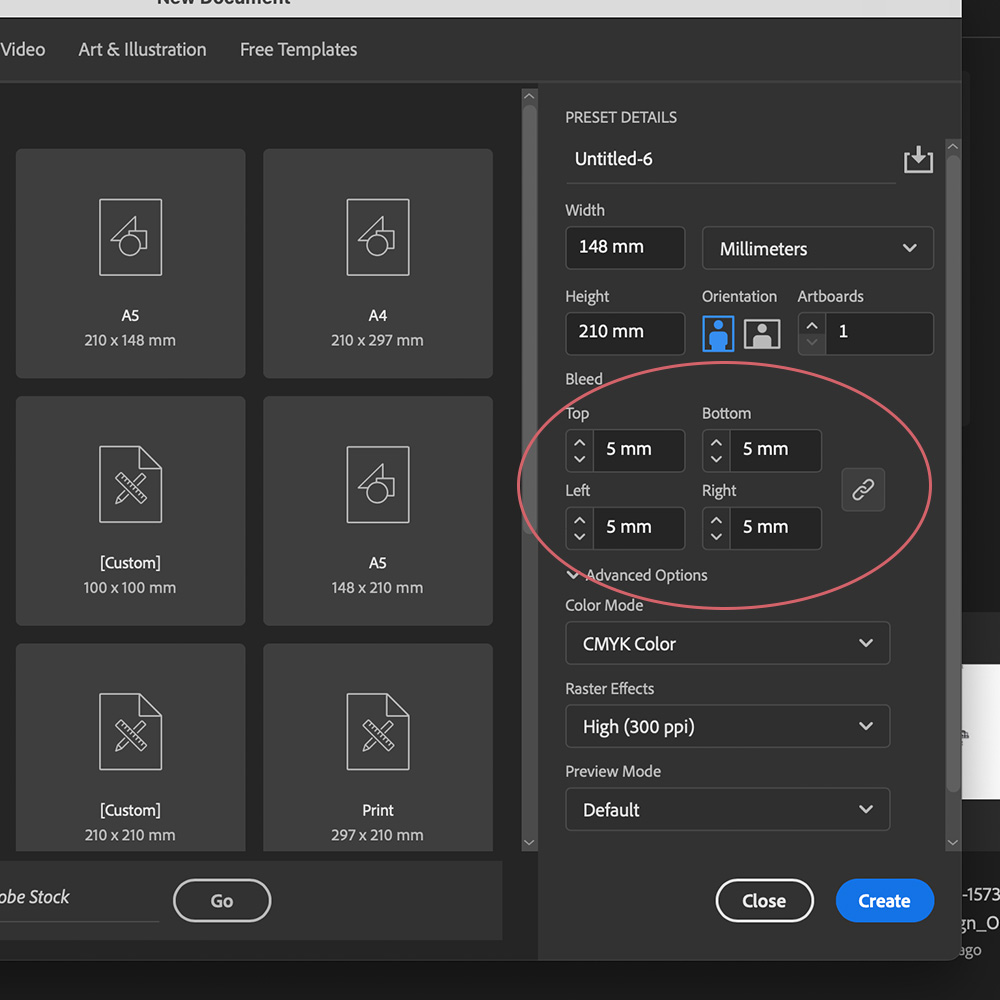
Create a new file with 5mm bleeds
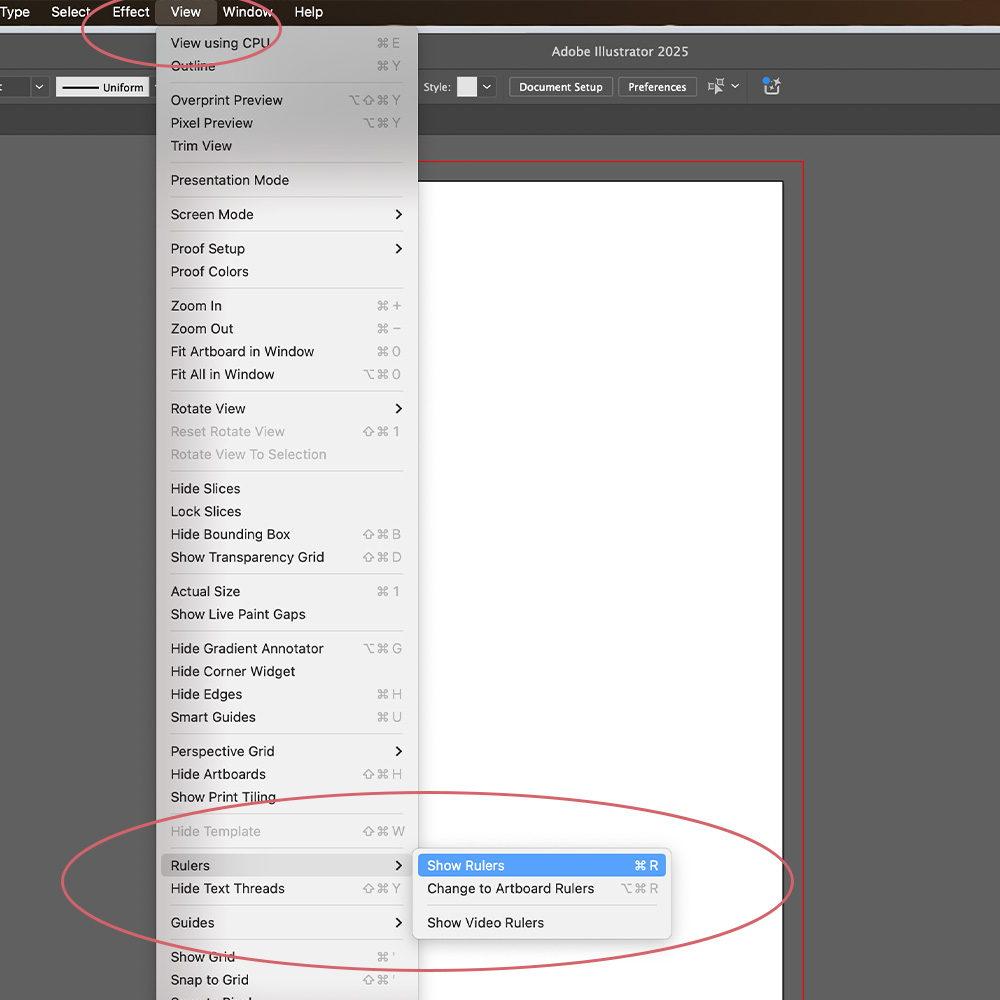
View > Ruler > Show Rulers
When the rulers appear, click on the ruler running along the top and drag a guide line down to the very start of the page.Once your guide line is placed simply go to your properties panel (on the right hand side) and set the Y value to 0.
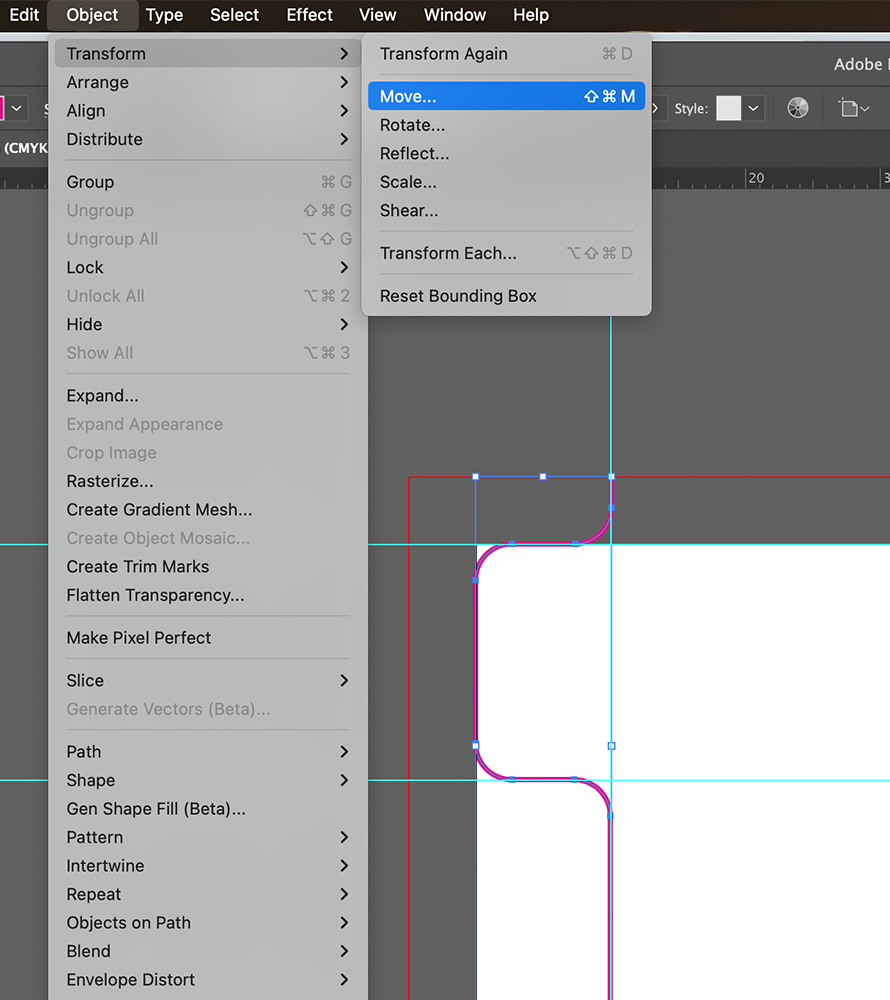
Click Object > Transform > Move
Ensure your ‘Horizontal’ value = 0 and Vertical Value = 17.5mm. ‘Distance’ value represents the width of your tabs so ensure these are also 17.5mm (please note 17.5mm is just the example size we have used to create 12 tabs). Make sure the angle is -90 degrees as this dictates the direction the repeat needs to go.
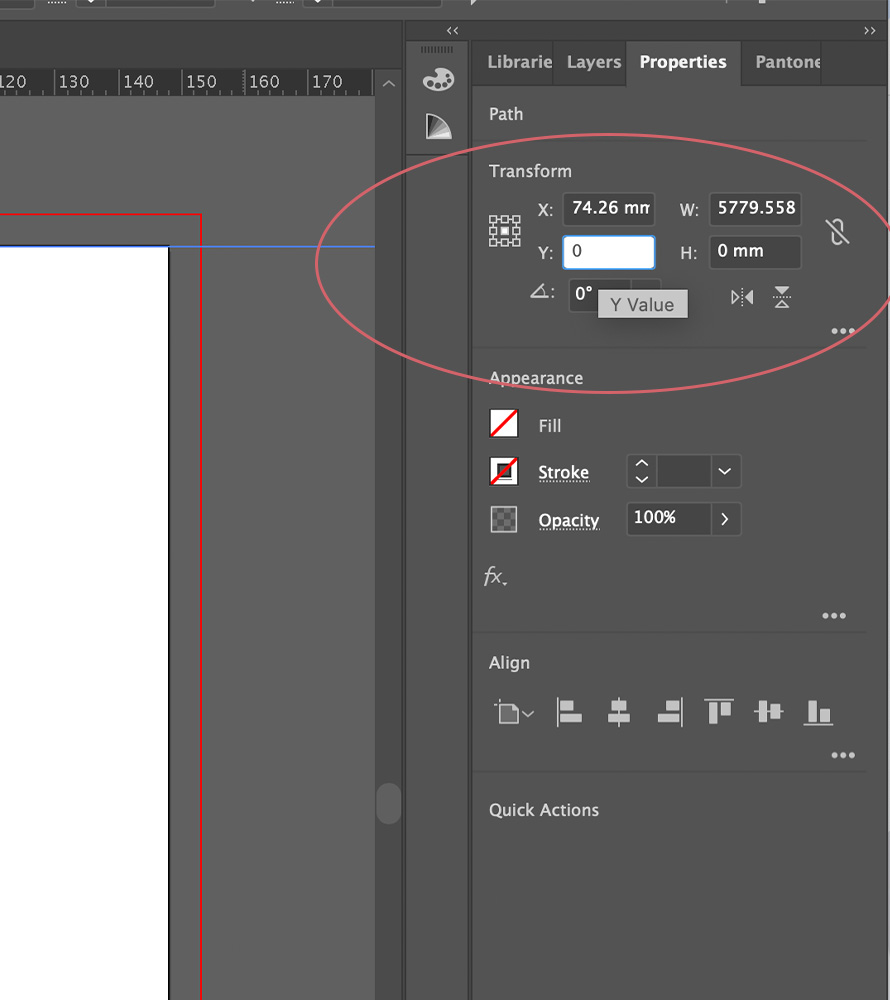
Properties Panel (right side)
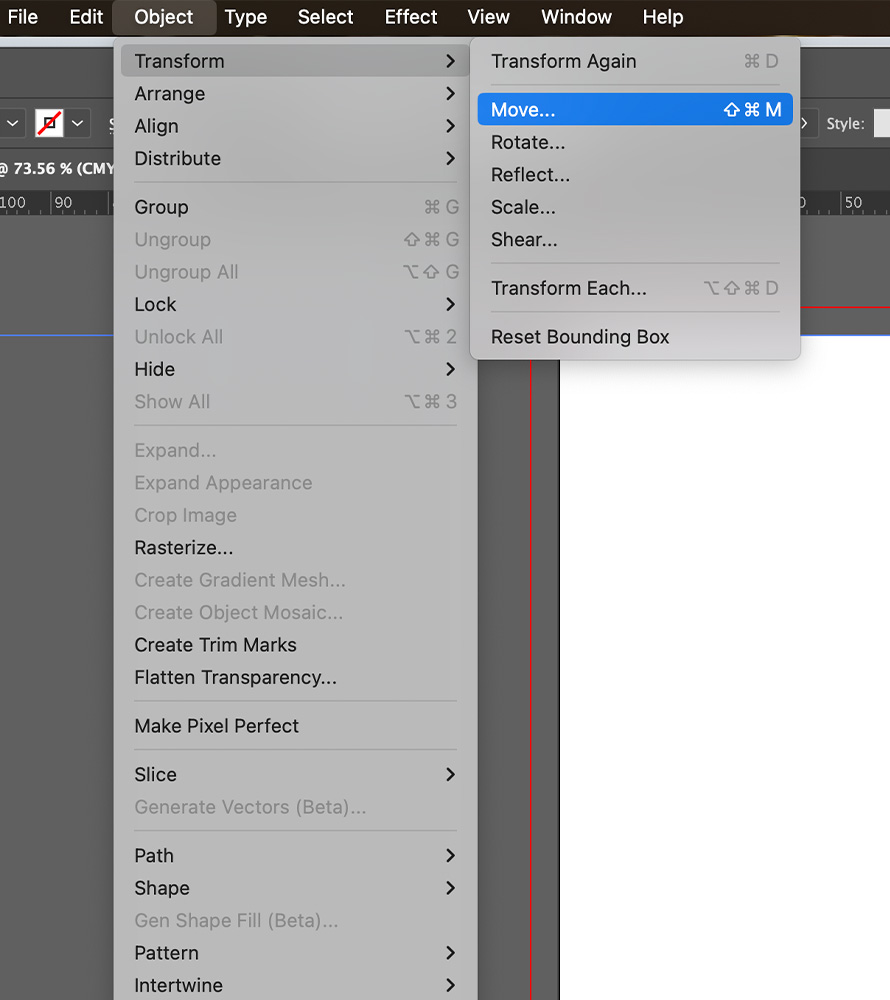
Click Object > Transform > Move
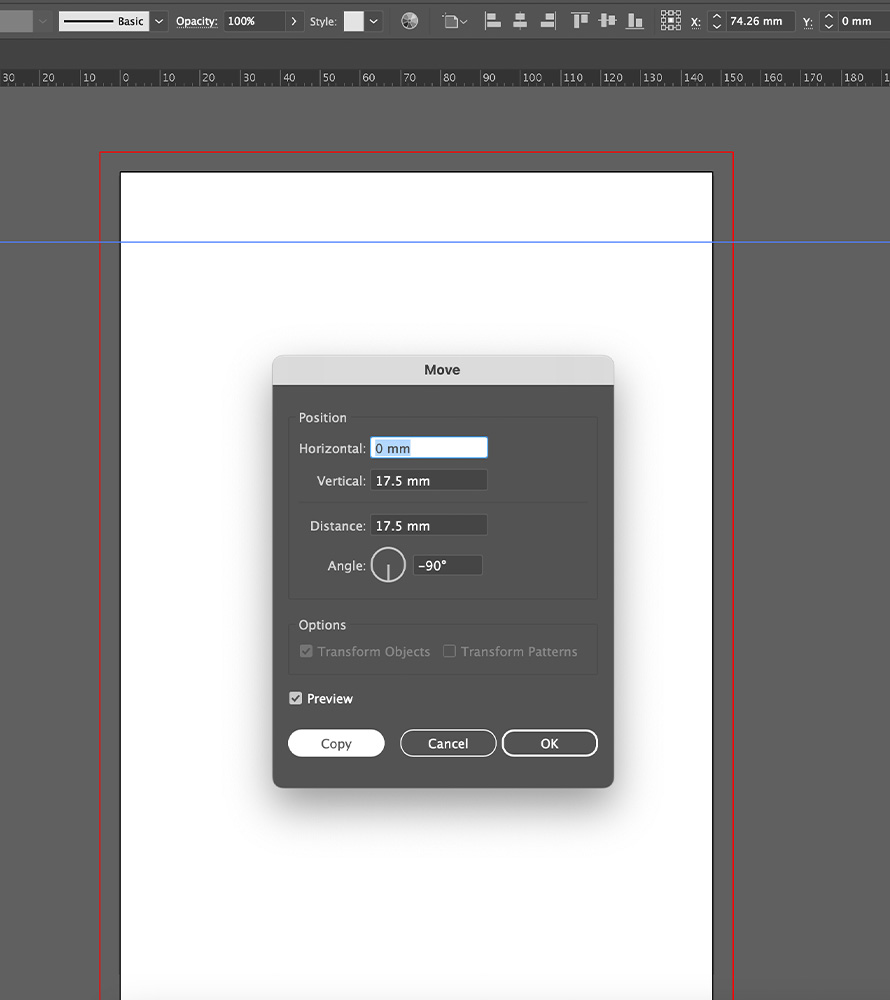
‘Horizontal’ value = 0 and Vertical Value = 17.5mm.
Once you’ve adjusted the repeat settings then press Copy then click COMMAND + D 11 times until the guides fill the full length of your page. This has now created 12 even rows within your page.
Click and drag the left ruler to create a single ‘Vertical’ guide line. Once you’ve placed the guide on the page, go to the properties panel and update the X value to 10mm – this will guide the depth of your tabs.
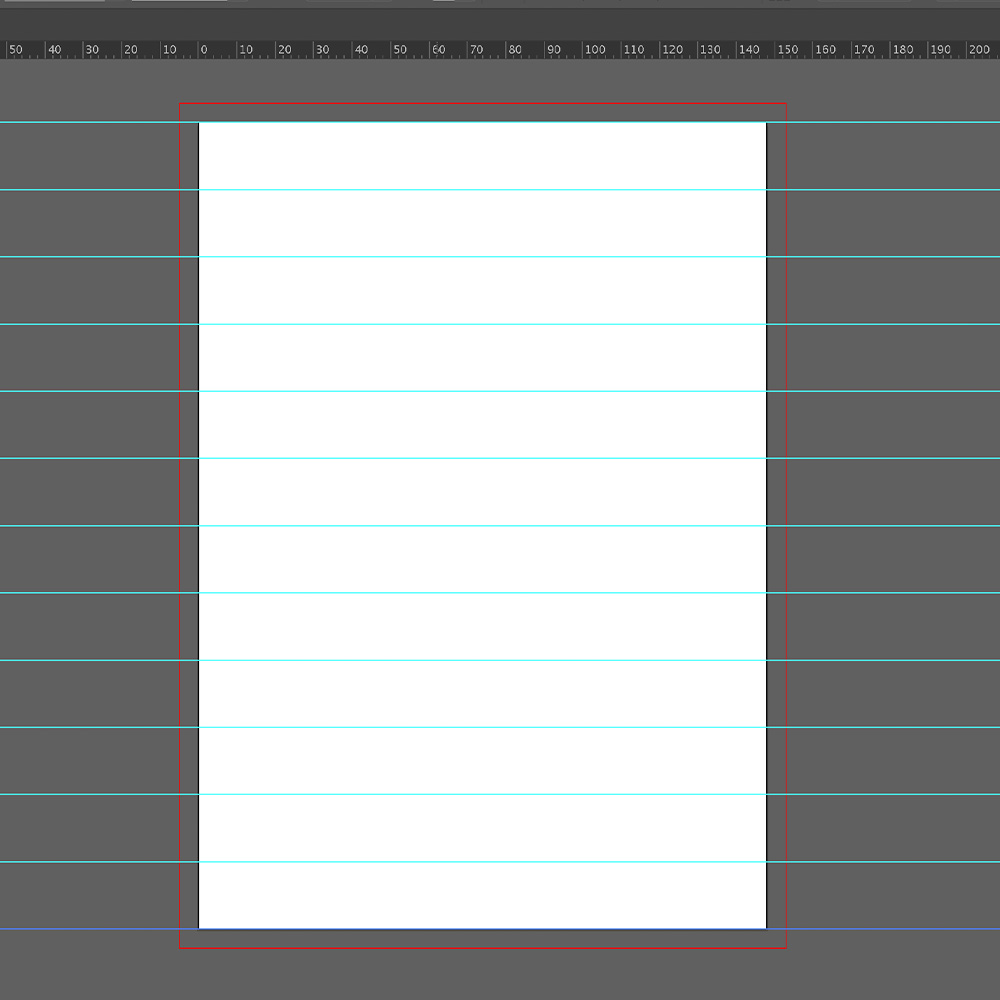
Repeated guides create 12 even rows
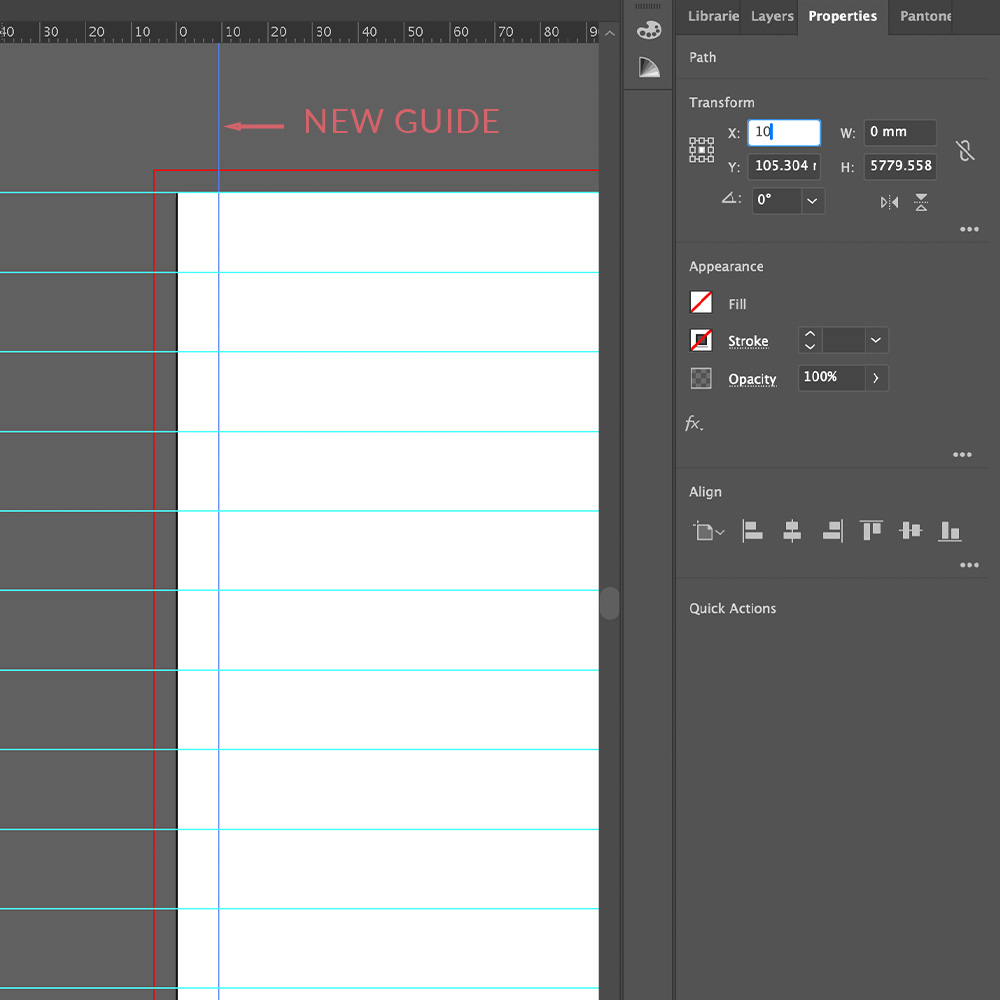
A vertical 10mm guide
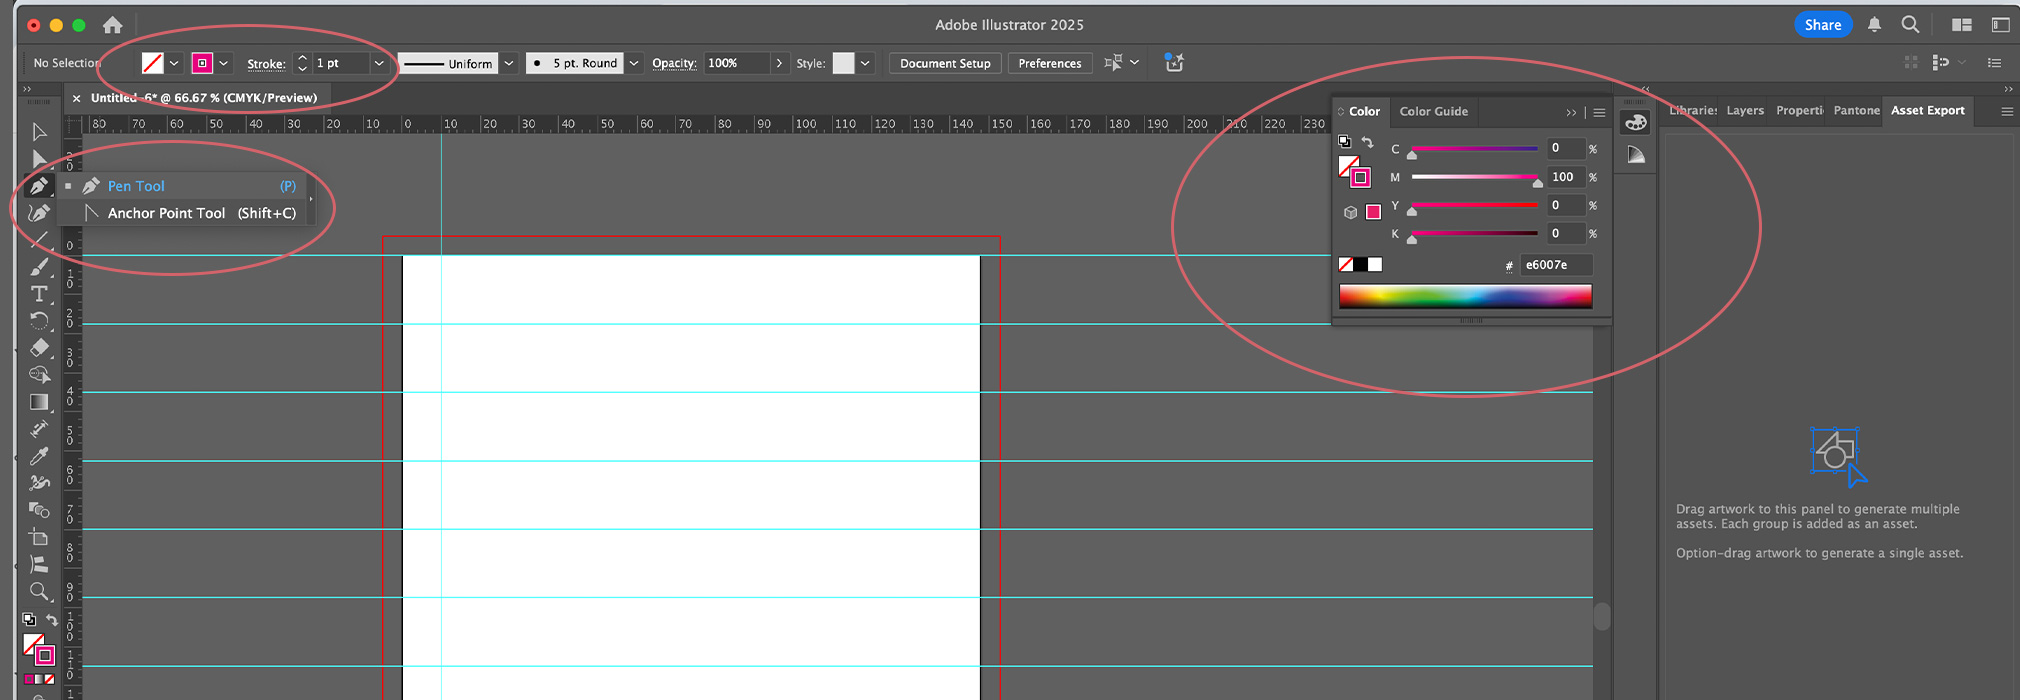
Step 2: Draw your tab shapes
Using the pen tool you will need to draw your tab shape. Start by adjusting the settings of your pen tool. Ensure the fill = NONE, Stroke = 2px, Stroke Colour = CMYK – 100% M value.
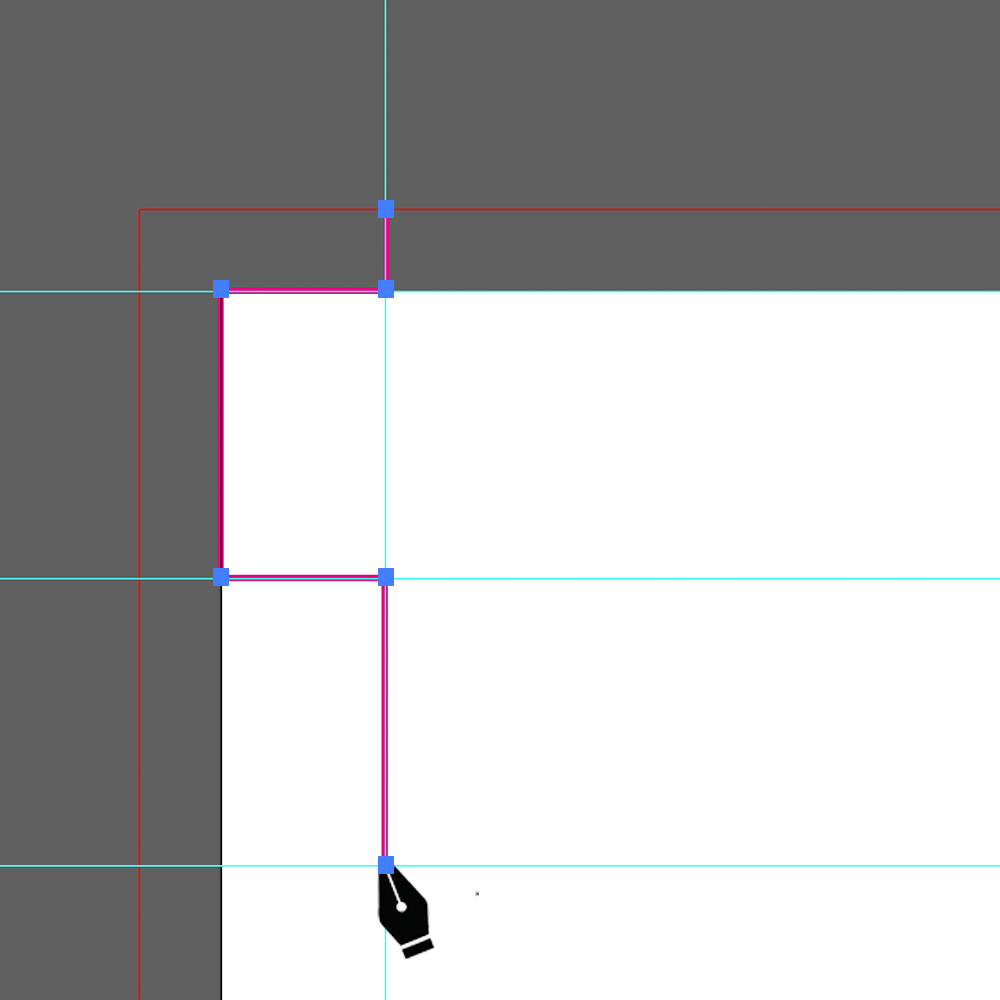
Start drawing your shape by clicking in the top area where the horizontal bleed mark (red) meets your vertical guide line (blue). Holding down the SHIFT key, then click on the following areas to create the shape as shown below.
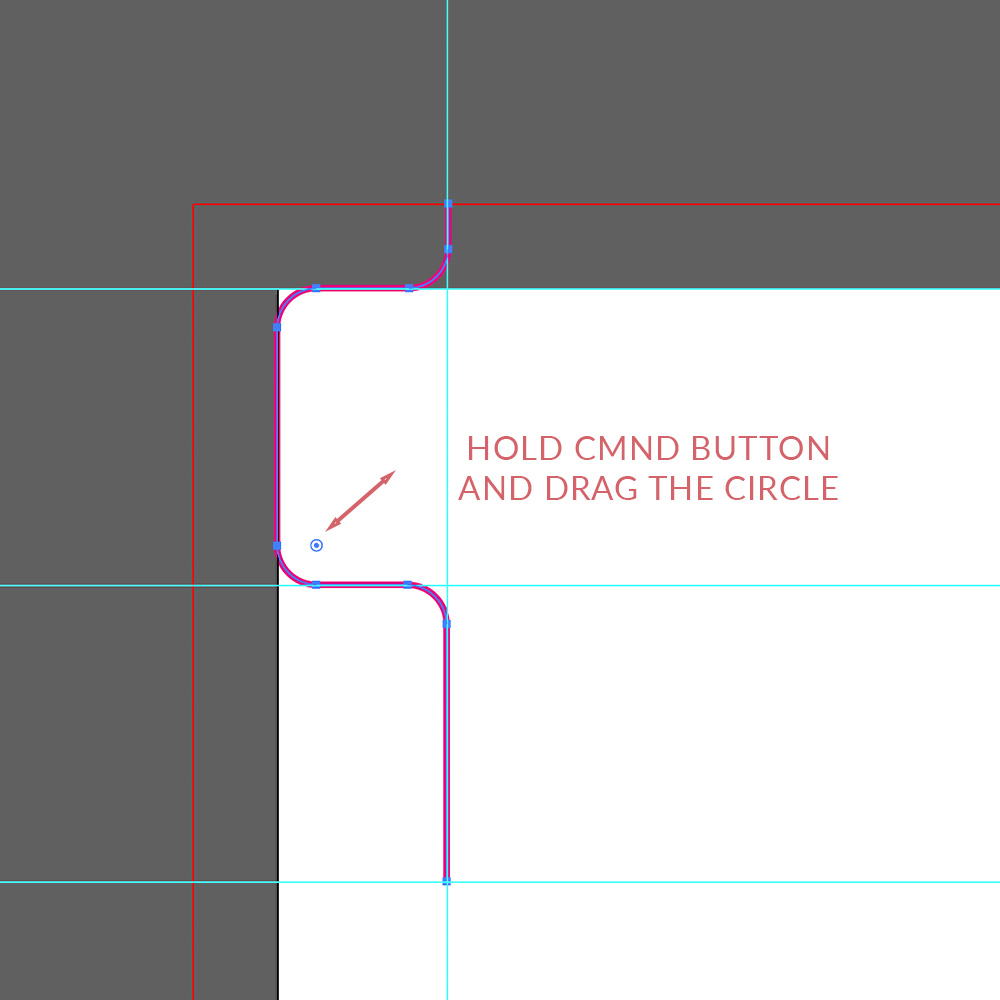
Once you’re drawn the shape you can choose to curve your tab edges. This is done by holding down the COMMAND key until the blue dots show up in each corner. Then while holding the COMMAND button you click and drag the circle until you are happy with the curve shape.
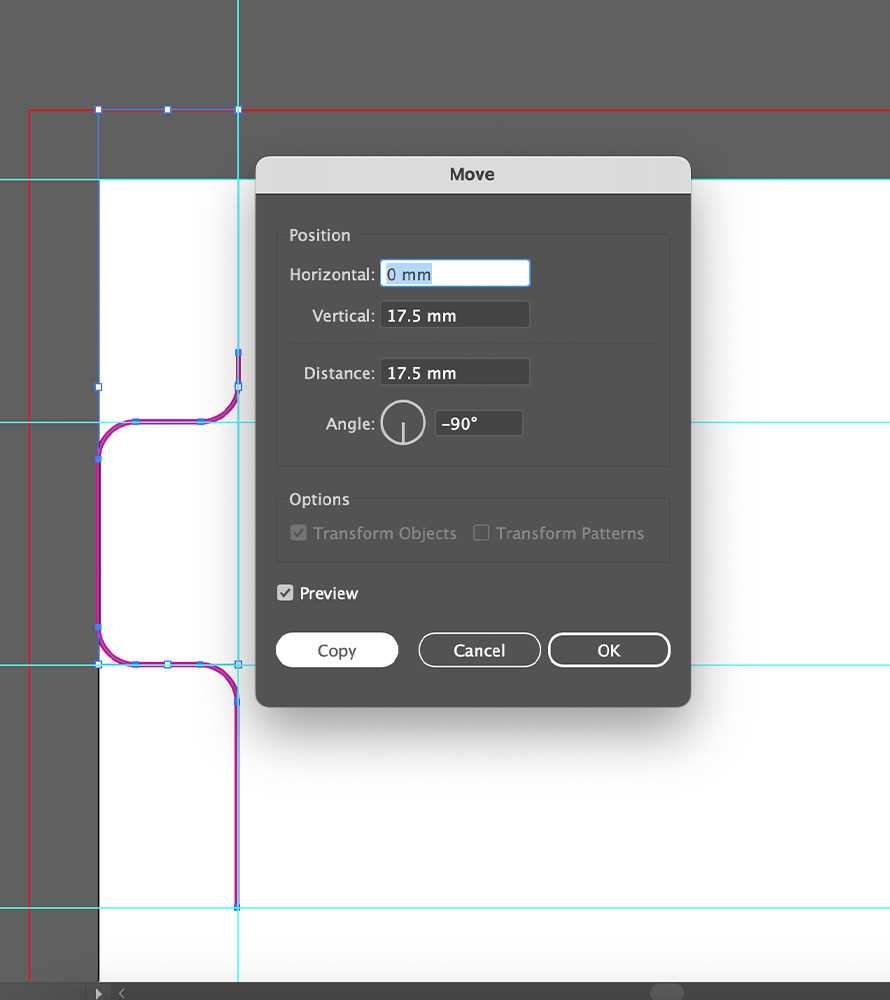
When you’re happy with the tab shape click Object > Transform > Move
Horizontal = 0 and Vertical 17.5mm. Distance is the width of your tabs so 17.5mm. Make sure the angle is -90 degrees as this dictates the direction the repeat needs to go.
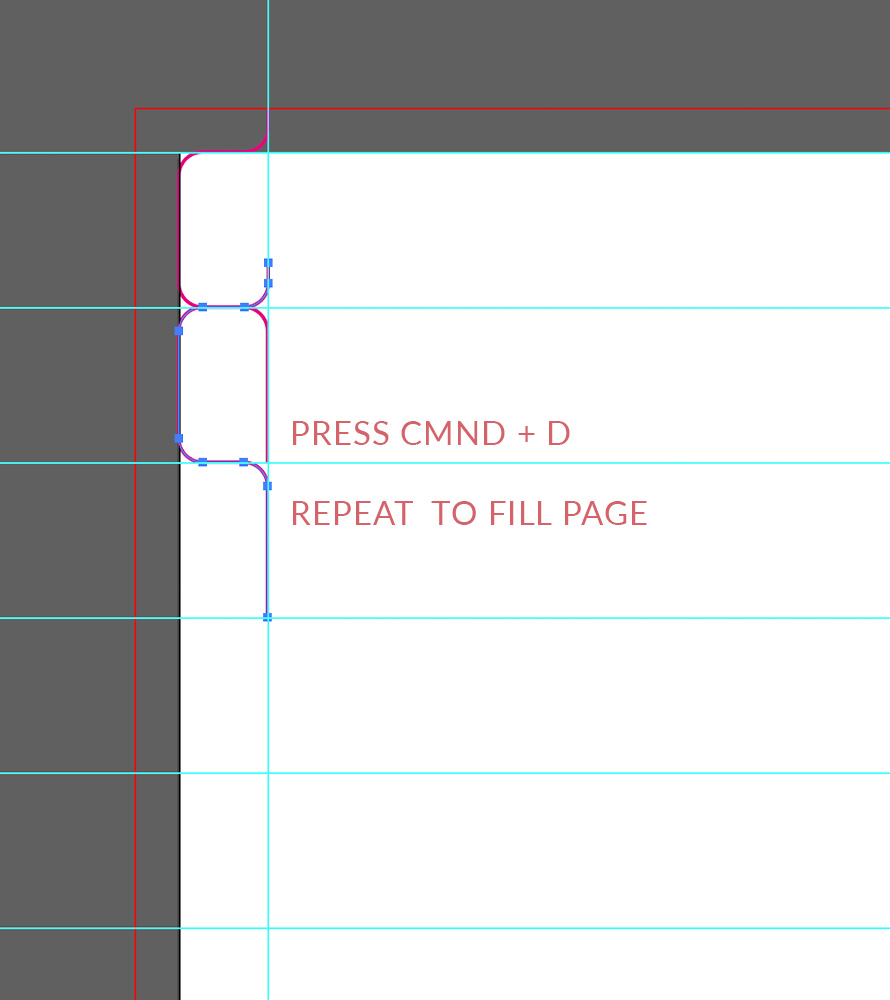
Press copy then click CMND + D and press 10 more times until the shape is repeated the full way down your page.
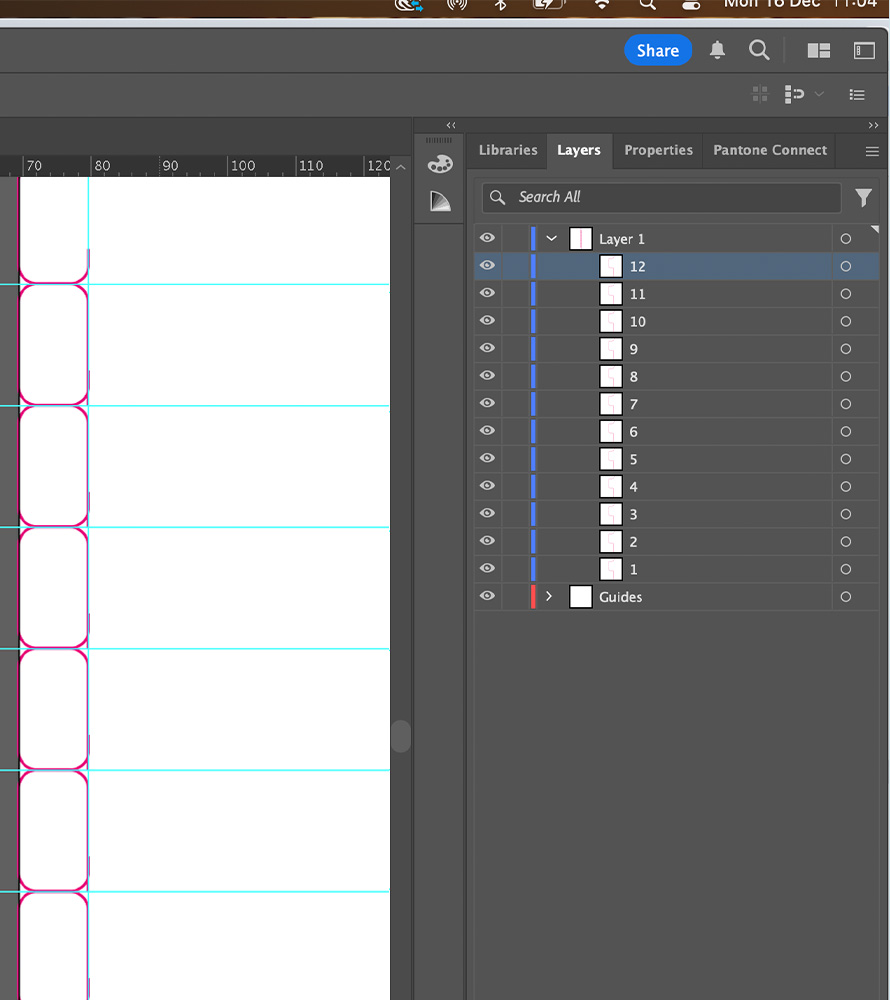
Rename your layers to match the order of the tabs for example 1 = chapter 1.
You will need to extend the tab on the bottom and top until the MAGENTA lines reach either end of the 5mm bleeds. To do this simply hide all layers except the first one.
Select the pen tool and click on your tab drawing, you will now see all of the transformation points within the shape (blue squares). Hover on either of the tabs ends until it shows a ‘/ ’ symbol, once you see this – it means that you can extend that part of the shape. Then click the blue square, hold down the shift key and pull the line until it meets the bleed mark at the end of the page. Do the same for the top of the tab shape.
Rename your layers to match chapters
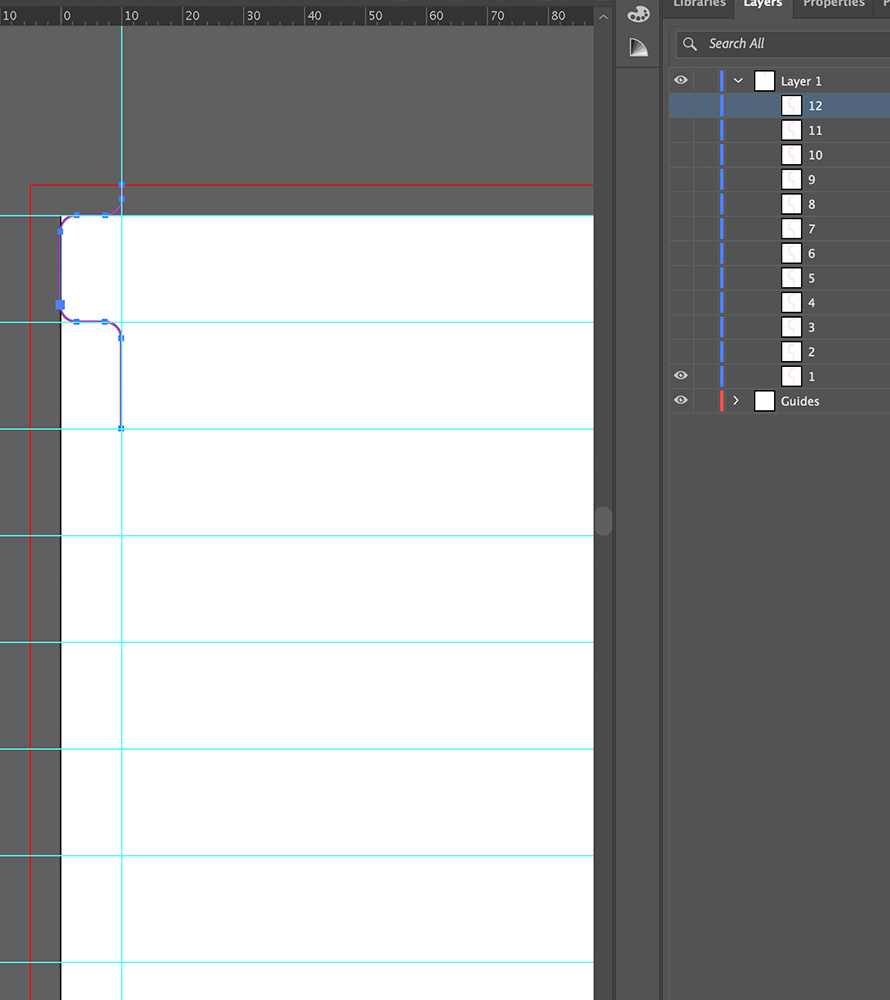
Hide other layers and click to edit the first
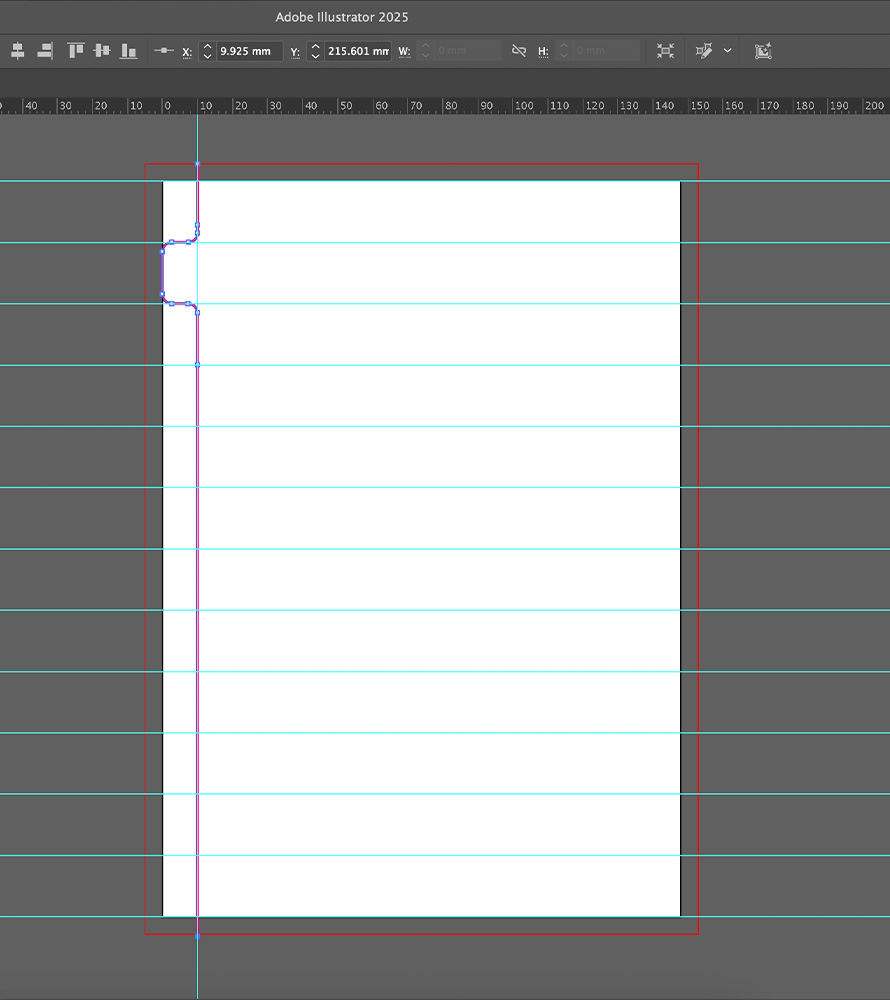
Extend the shape using the pen tool
Once you’ve extended the drawings in layer number one, move onto layer two until all tab drawings have been extended.
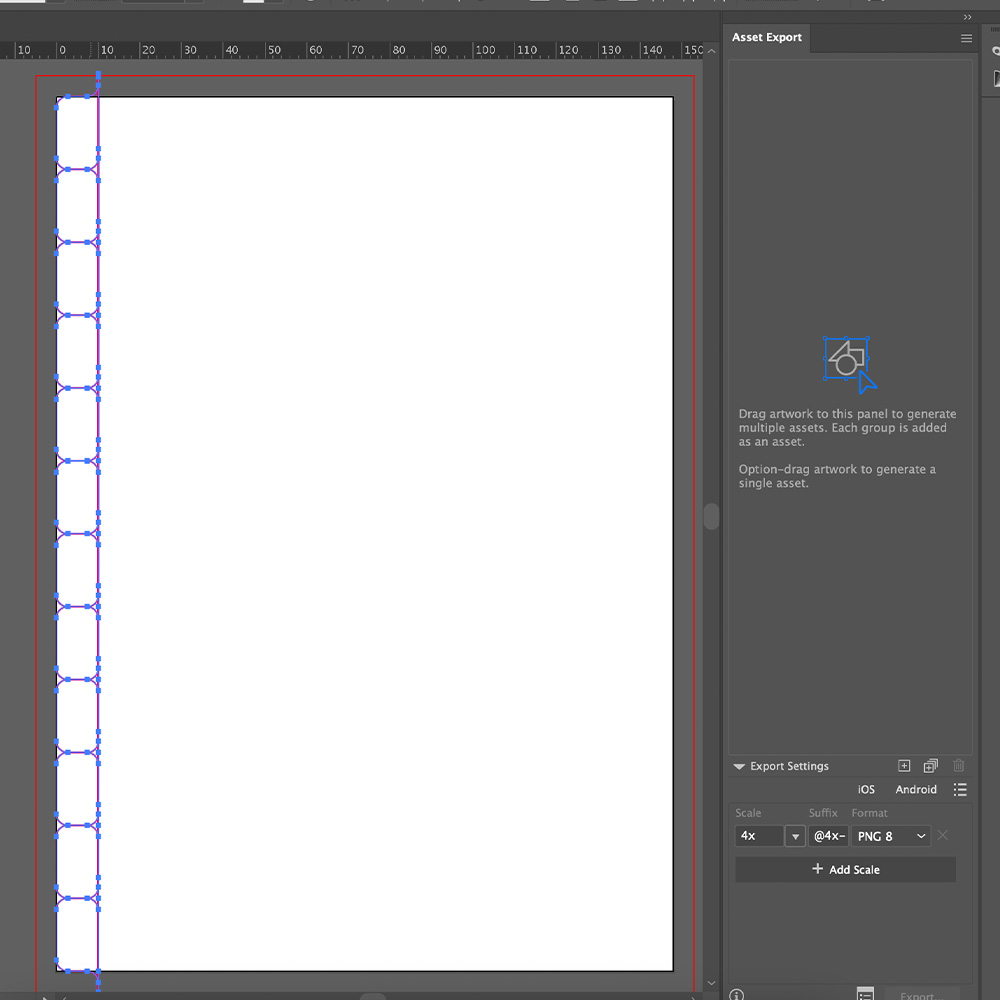
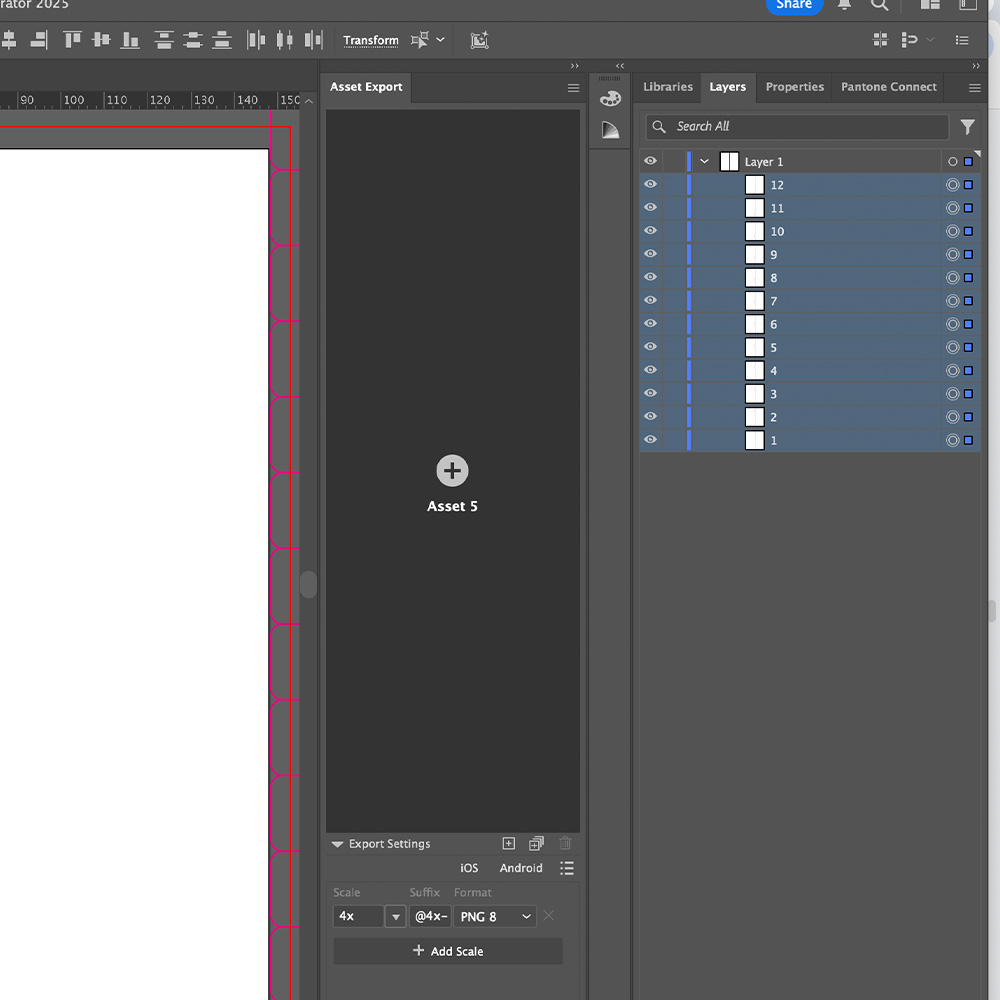
Click Window > Asset Export > Select all your layers 1-12 and drag and drop them into the asset export window.
In the asset export window make sure to select all of the media you just added. In the dropdown select PDF and export.
In the asset export window make sure to select all of the media you just added. In the dropdown select PDF and export.
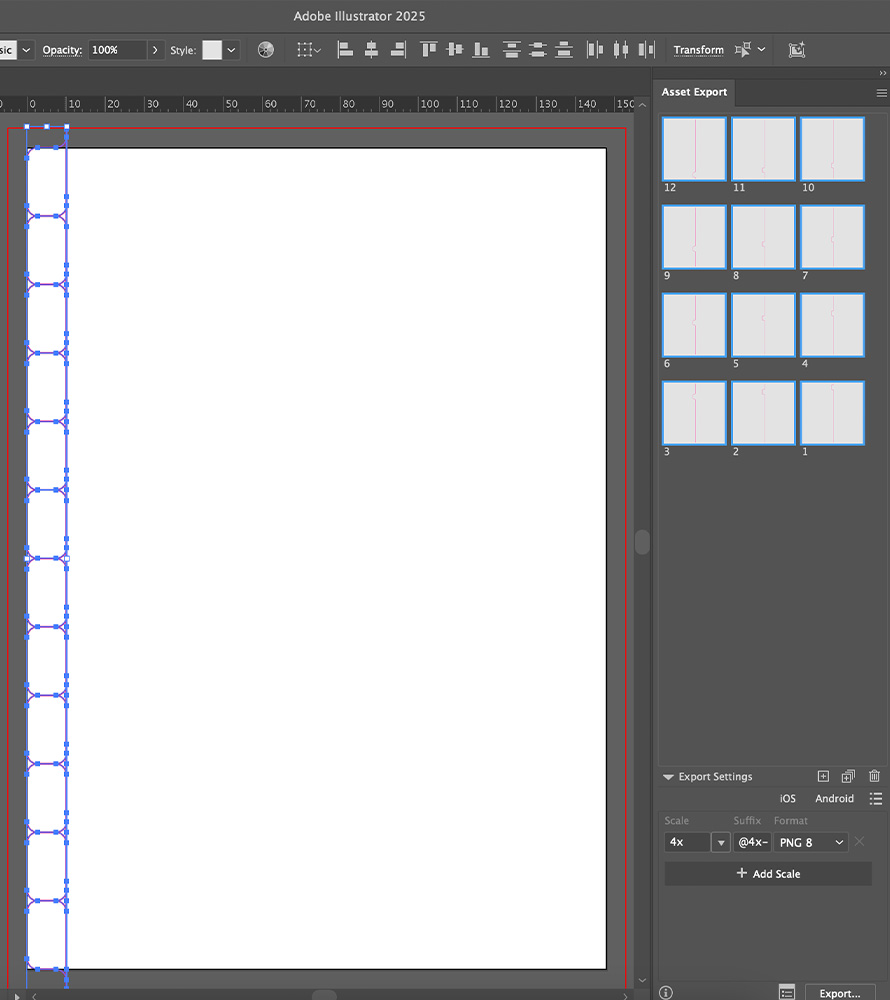
All layers placed into asset export window
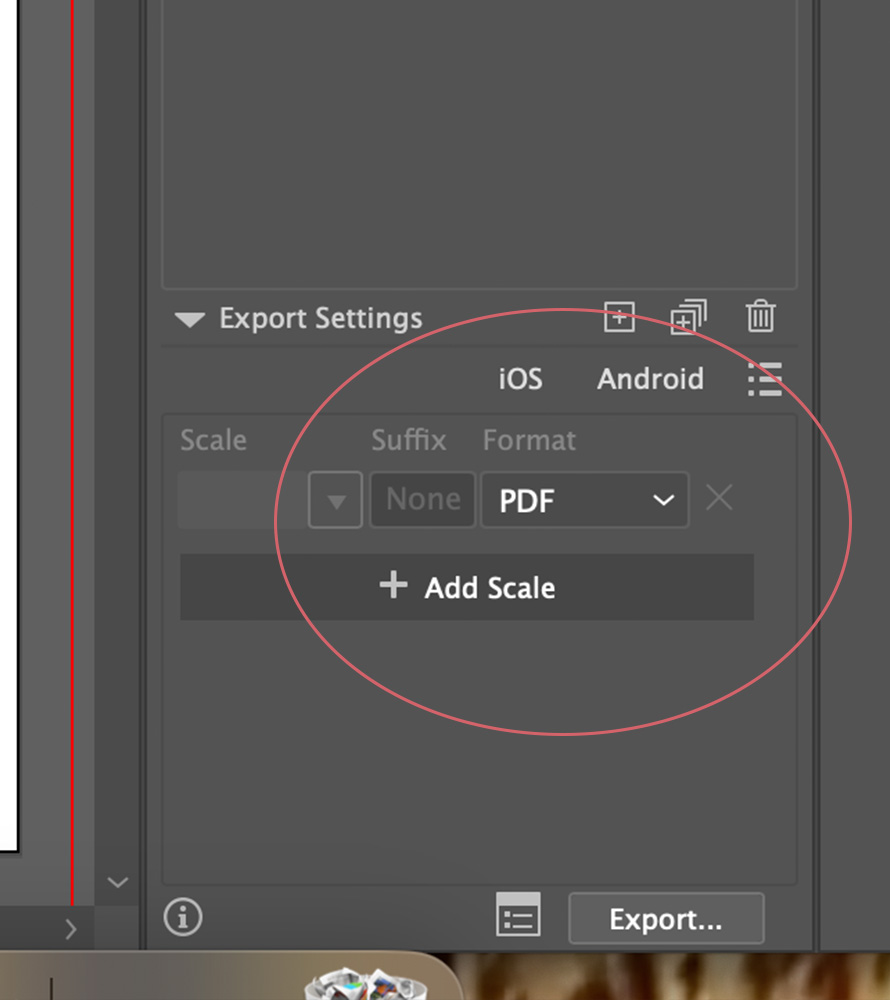
PDF export settings
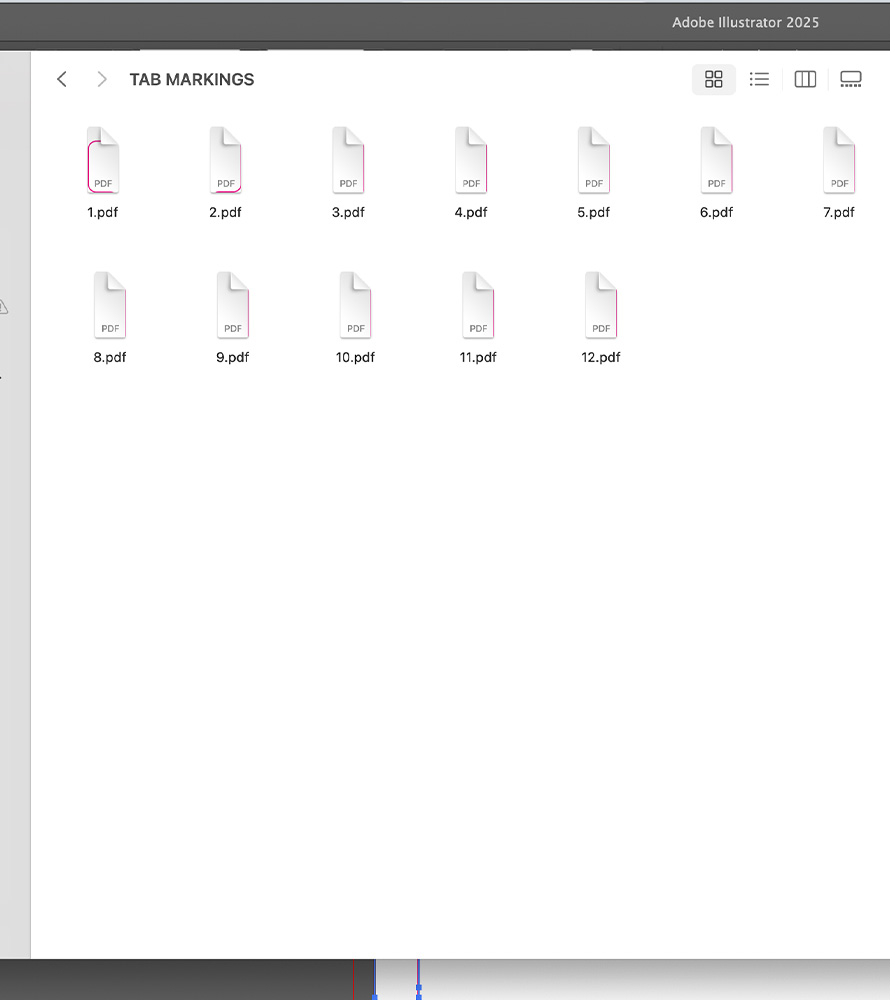
Exported layers
Step 3: Apply your tab drawings to your InDesign file.
Open InDesign, select the A5 template and adjust the size to 158mm x 210mm (giving extra 10mm for your tabs). Ensure to include a 5mm bleed for the document and a 10mm gutter. The gutter will act as a guide for placing your tab templates.
Go to pages panel on your right side and double click to edit Parent A spread.
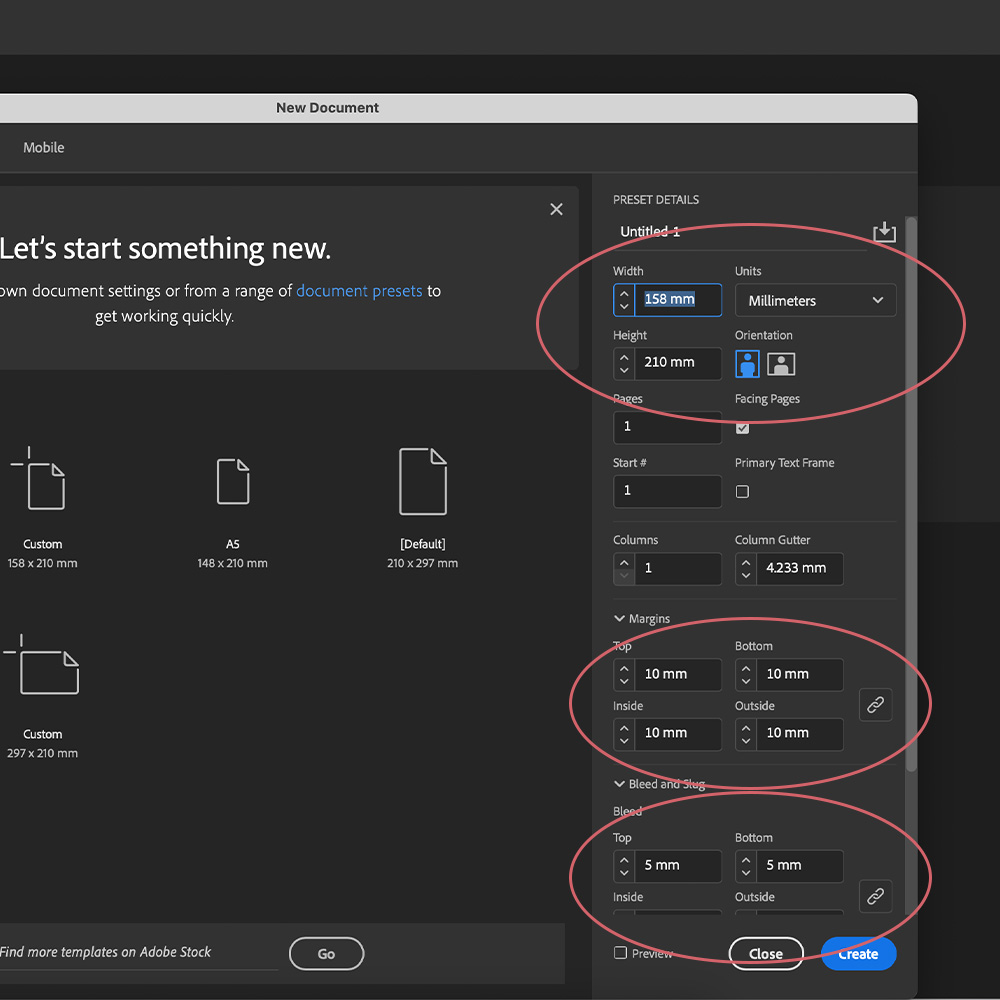
Create your InDesign file

Edit ‘Parent’ template
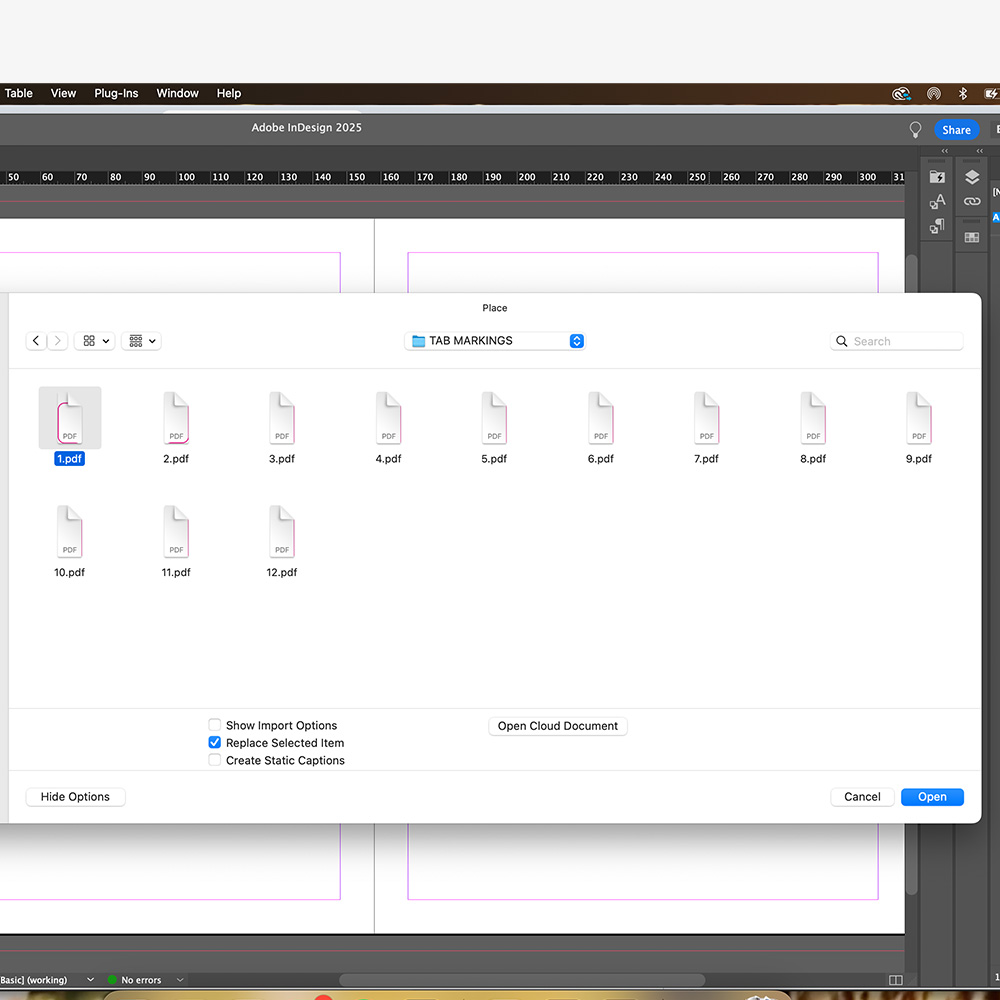
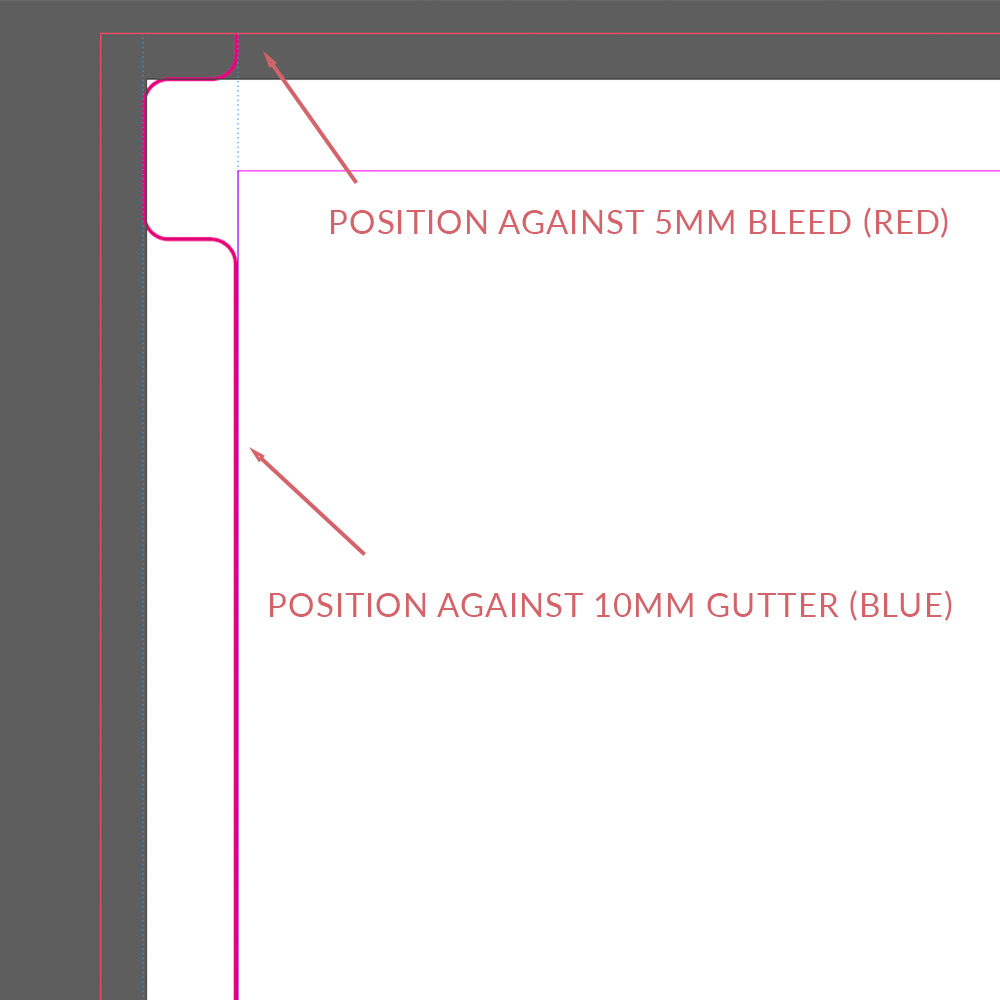
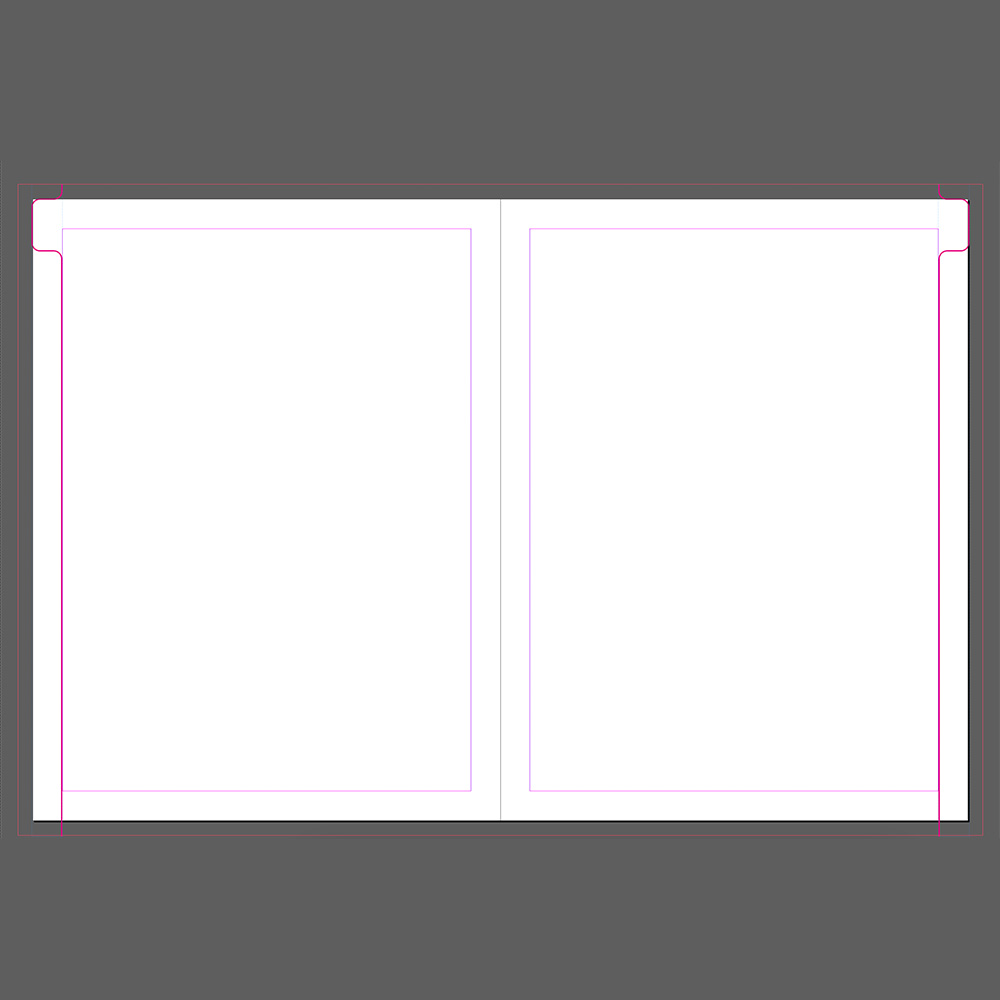
Now that parent A spread is ready to be edited, click Command + D to place your first tab drawing. Select tab template 1 and position it right along the gutter and against the top bleed line.
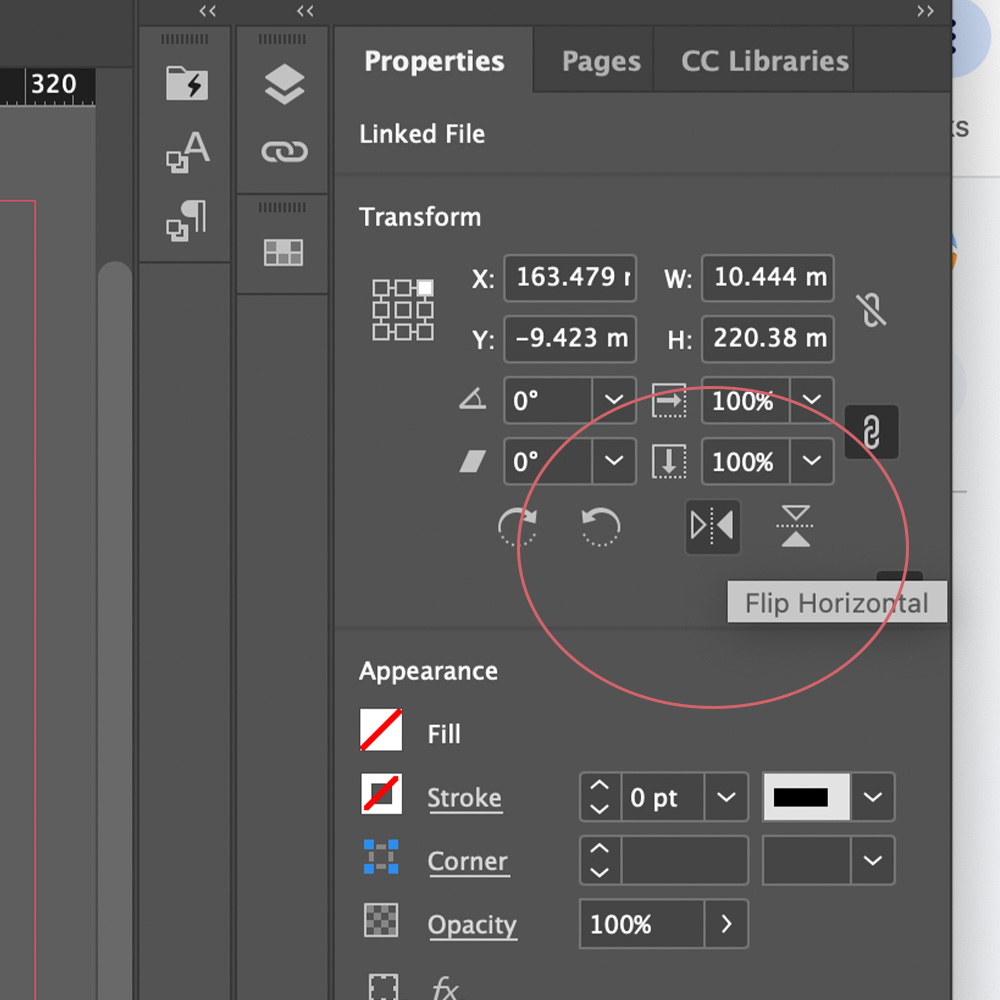
Copy and paste the shape then go to the property panel on your right and click to ‘Flip Horizontal’. Once the shape is mirrored you need to position it against the bleed and gutter but on the other page. Once you have done this, you should have a tab on either side of the spread.
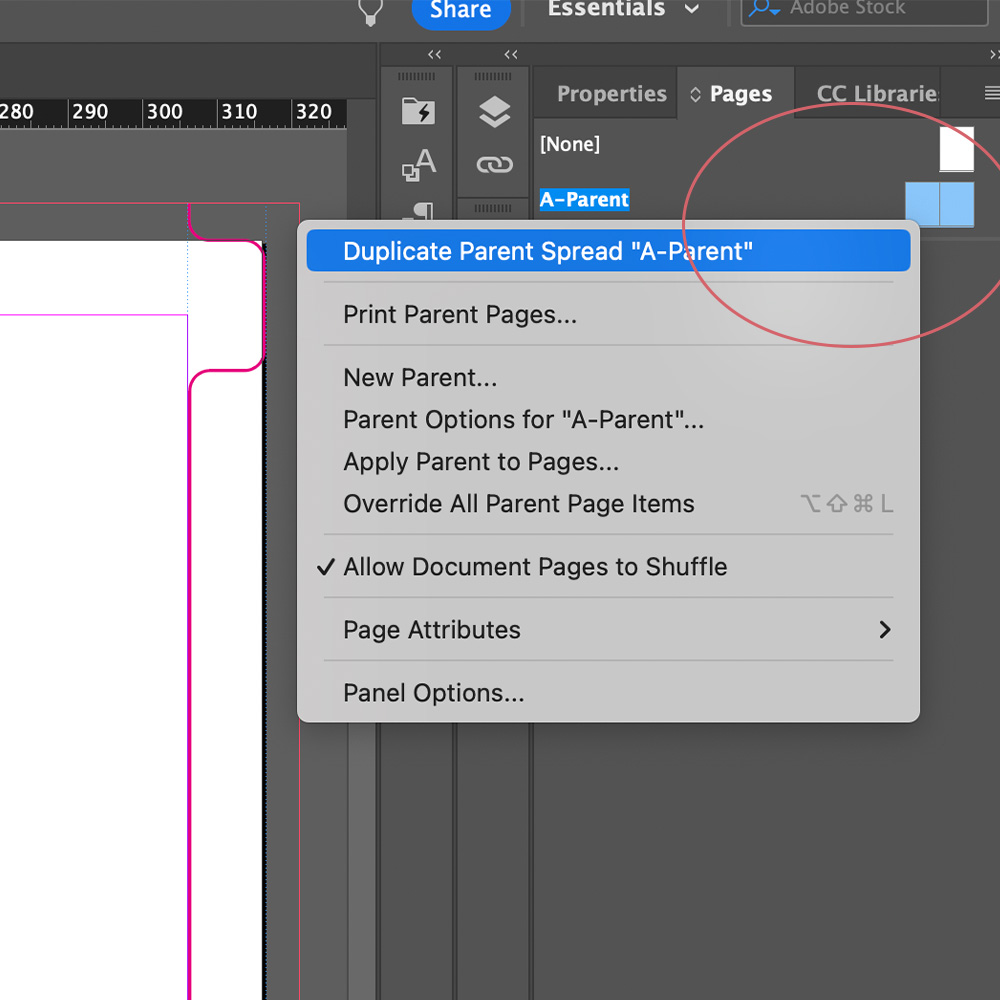
Once the first parent spread is set up, you need to duplicate the parent spread and add in the correct tabs for each section. Simple select the Parent A spread and right click > Duplicate Parent Spread.
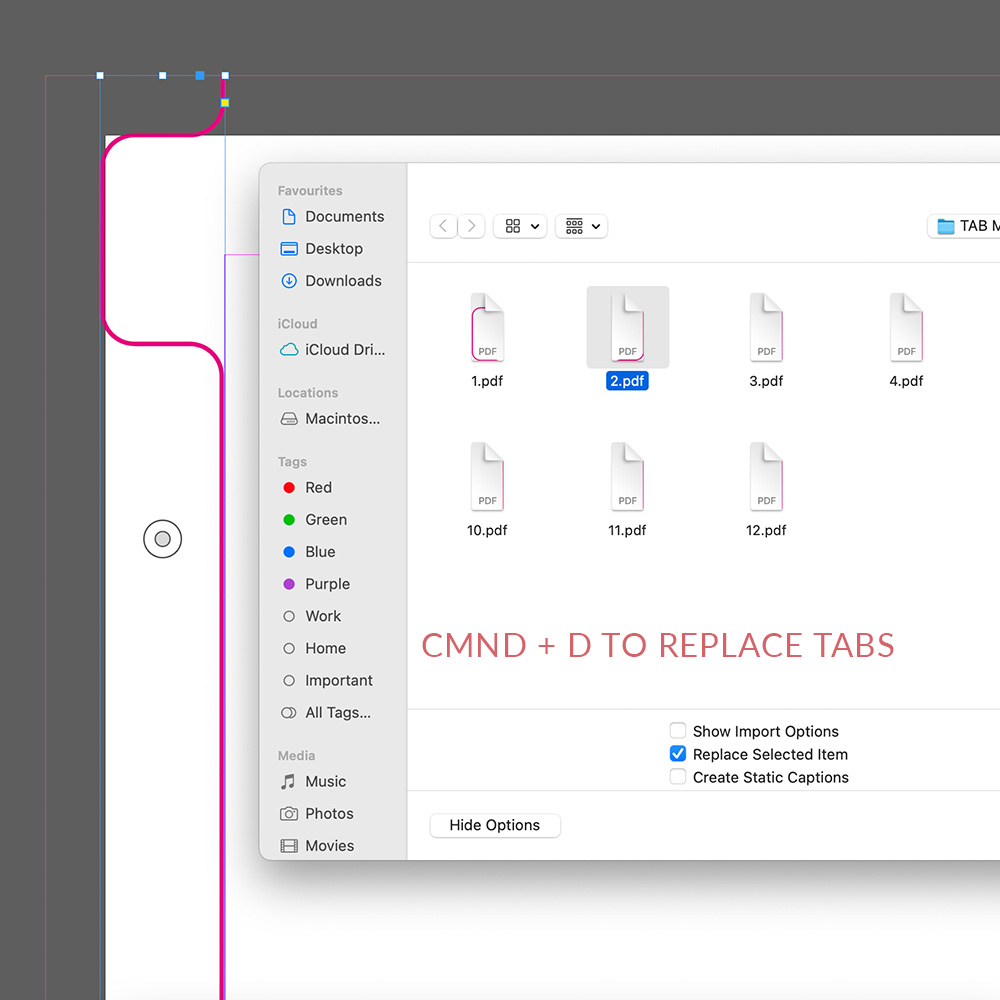
Once you have opened Parent Spread B, simply click on the left tab drawing and press COMMAND + D to replace it. Repeat the same steps on the other side.
Then repeat the steps of duplicating a parent spread and replacing the tab drawings
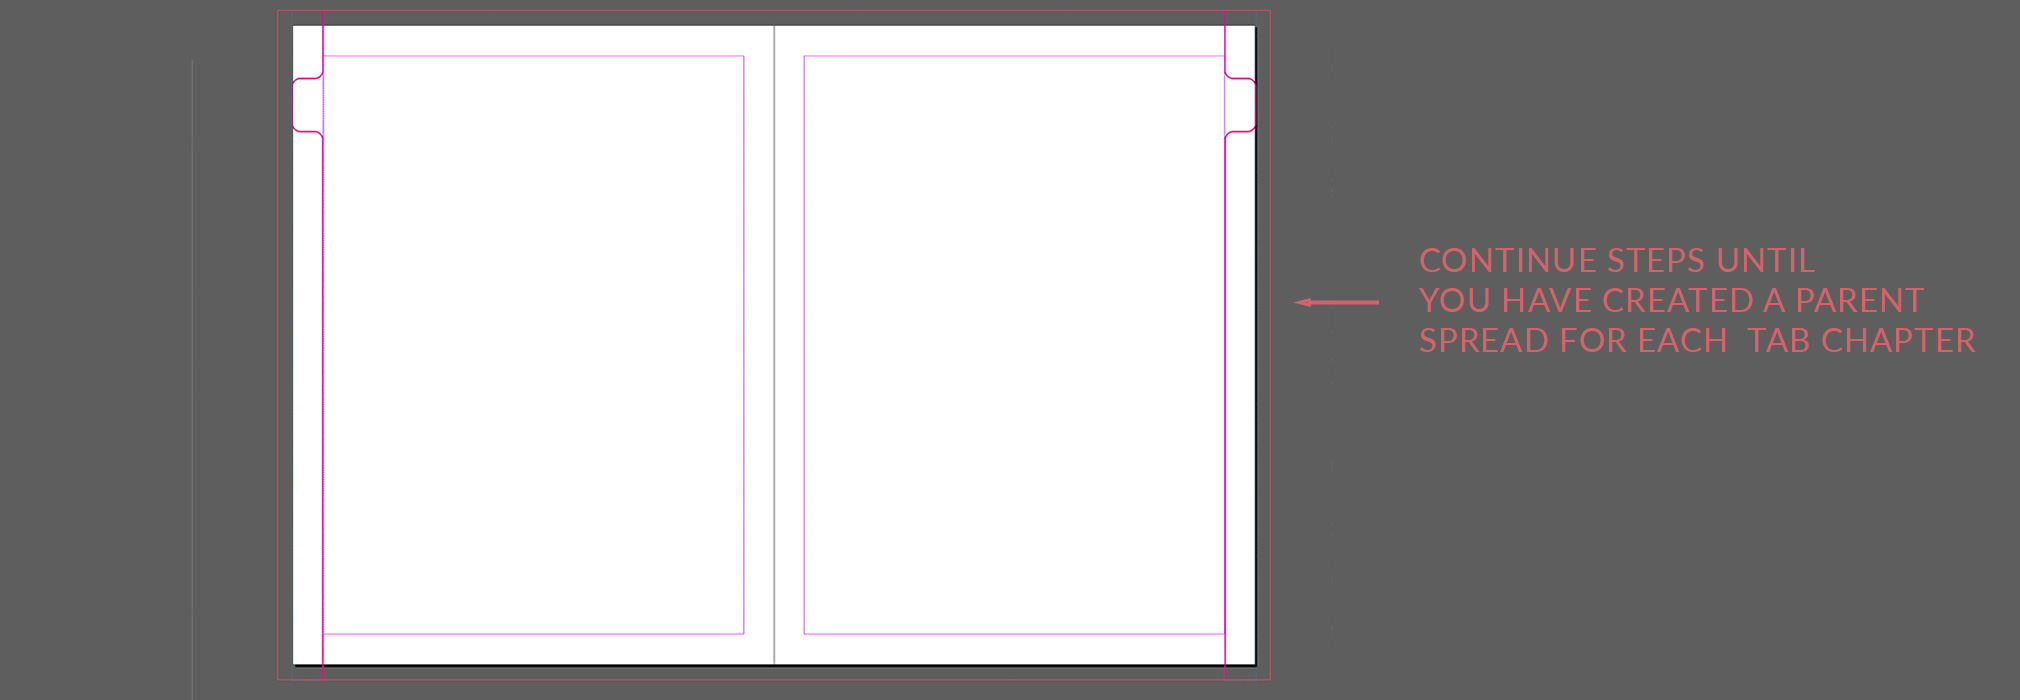
Repeat ‘duplicate parent’ and ‘replace image’ steps until a spread with a new set of tabs exists for all 12 tabs
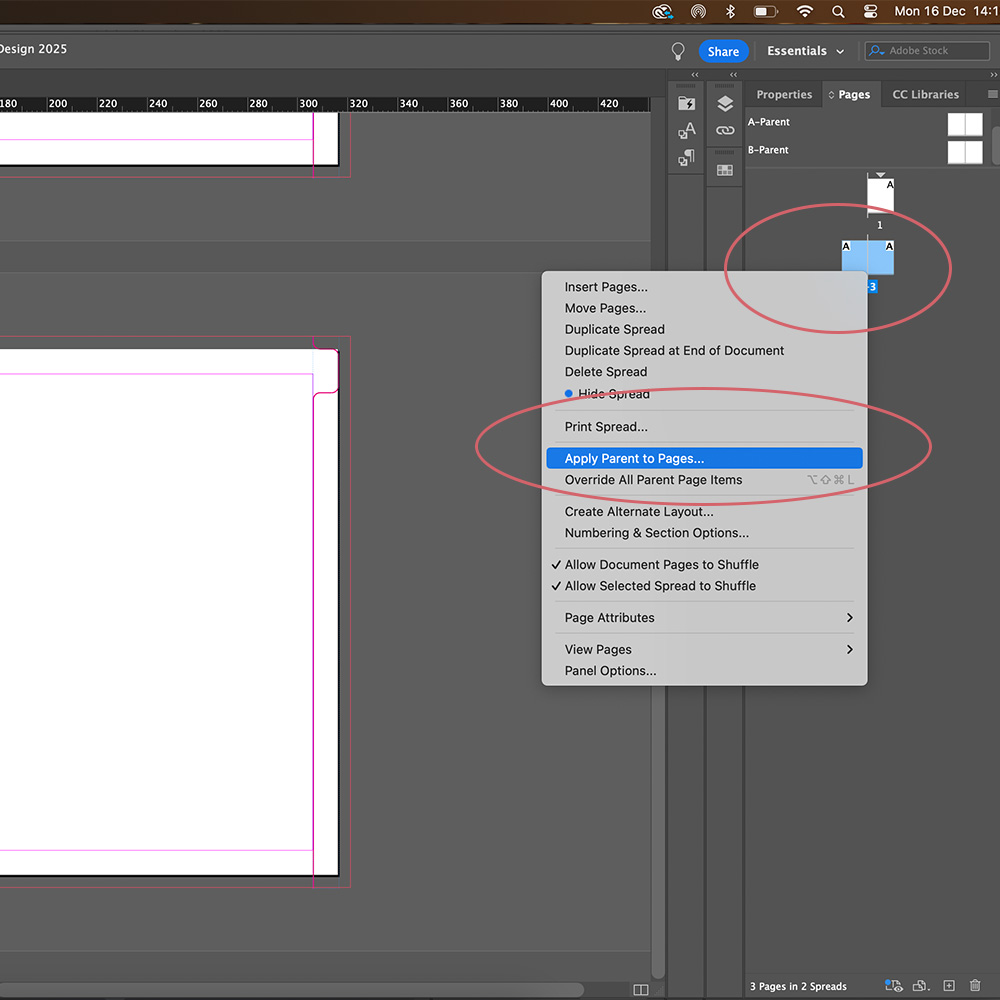
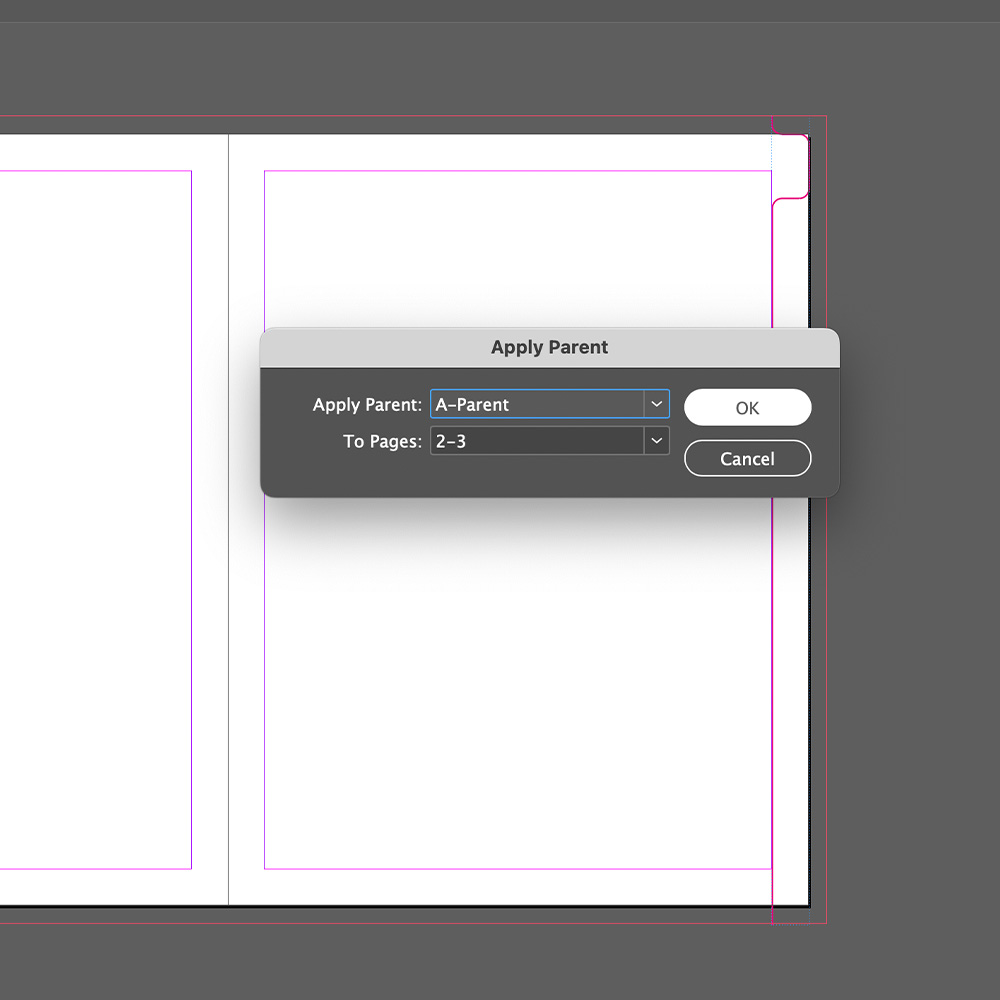
Once your parent spreads have been set up, ensure to apply the correct parent page to each of your chapters. The magenta tab shapes will appear on all the pages that the parent spread has been applied to.